Friday, August 12, 2011

Make It Monday: Copic Striped Ribbon - Take 2

This weekend the son of one of my cousin's is getting married. They're having a sort of non-traditional on the farm wedding, so I wanted to make a non-traditional card for them. I was also thinking about different ways to use custom Copic striped ribbon for Papertrey Ink's Make It Monday tutorial. And a lightbulb went on in my head: it would be really cool to try to make a rainbow with ribbon. So I did!


I used seam binding ribbon and instead of leaving white space between my stripes, I lined them right up next to each other. The beauty of using seam binding was that the color bled ever so slightly together, just like a real rainbow. I added score tape to the ribbon once it was colored and pleated it while I adhered it to the card piece. I think machine stitched 3 times up and down the rainbow to hold it all in place and add an extra textural element.


The background was stamped using the clouds from Up, Up & Away stamped in Fresh Snow on Spring Rain cardstock. I used selective inking on the sentiment from Up, Up & Away Sentiments so that it fit nicely in the corner of the card. I die cut the largest balloon image, stamped, and colored with Copics. It was adhered with pop dots over the rainbow. I then attached the piece to an Enchanted Evening card base.


I'm very happy with the end result, the rainbow ribbon turned out even better than I had imagined. I hope the happy couple enjoys it and wish them a lifetime of happiness.


Thanks for stopping by!


Supplies: Cardstock - Papertrey Ink Stampers Select White, Enchanted Evening, Spring Rain; Stamps - Papertrey Ink Up, Up & Away and Up, Up & Away Sentiments; Die - Papertrey Ink; Ink - Papertrey ink True Black, Fresh Snow; Markers - Copic; Ribbon - Tim Holtz; Thread - Coats & Clark


Make It Monday: Copic Colored Ribbon - Take 1

With my hubby and kids off to South Dakota and nobody needing me to help them go potty or play games or snuggle, I had the evening yesterday to get a little crafty. What better way to spend my time than making a couple of special cards for special people?

This week's Make It Monday at Papertrey Ink challenges you to customize ribbon using Copic markers. It just so happens that I have ribbon (lots of ribbon) and I have Copics (plenty of Copics), so I went to work.


I was very happy to find that this sentiment from Think Big Favorites #6 fits perfectly on the Mat Stack #5 die. Together they make a perfect focal point, embellished with the sweet flower stamp from Tag It's #5.

I made this card for Janelle, a fellow member of the PTI message board forum. Janelle was recently found to have a malignant brain tumor, and I wanted to send her a note to tell her she is in my thoughts and prayers. If you're the praying type, it would be great if you could lift her up as well.

Thanks for stopping by, and have a wonderful weekend!


Supplies: Cardstock - Papertrey Ink Rustic White; Patterned Paper - Authentique; Stamps- Papertrey Ink Think Big Favorites # 6, Tag It's #5; Die- Papertry Ink Mat Stack #5; Markers- Copic; Ink - Papertrey Ink True Black, Ripe Avocado, Jenni Bowlin Chewing Gum; Ribbon- Offray

Friday, August 5, 2011

Family Altered Art Project with Authentique

There's more to papercrafting than just scrapbooking and card making, and it's nice to step outside of the box once in a while and create an extra special work of (he)art.

I've had these wooden birdhouse pieces in my stash for a while that I picked up at my local Jo-Ann's store, and this week I was struck with an idea for how to use them.
This 6x6 paper pad from Authentique has some great patterns in it, and I knew that it had just what I needed for my project. I also pulled out some "Diction" stickers and embellishments and went to work.
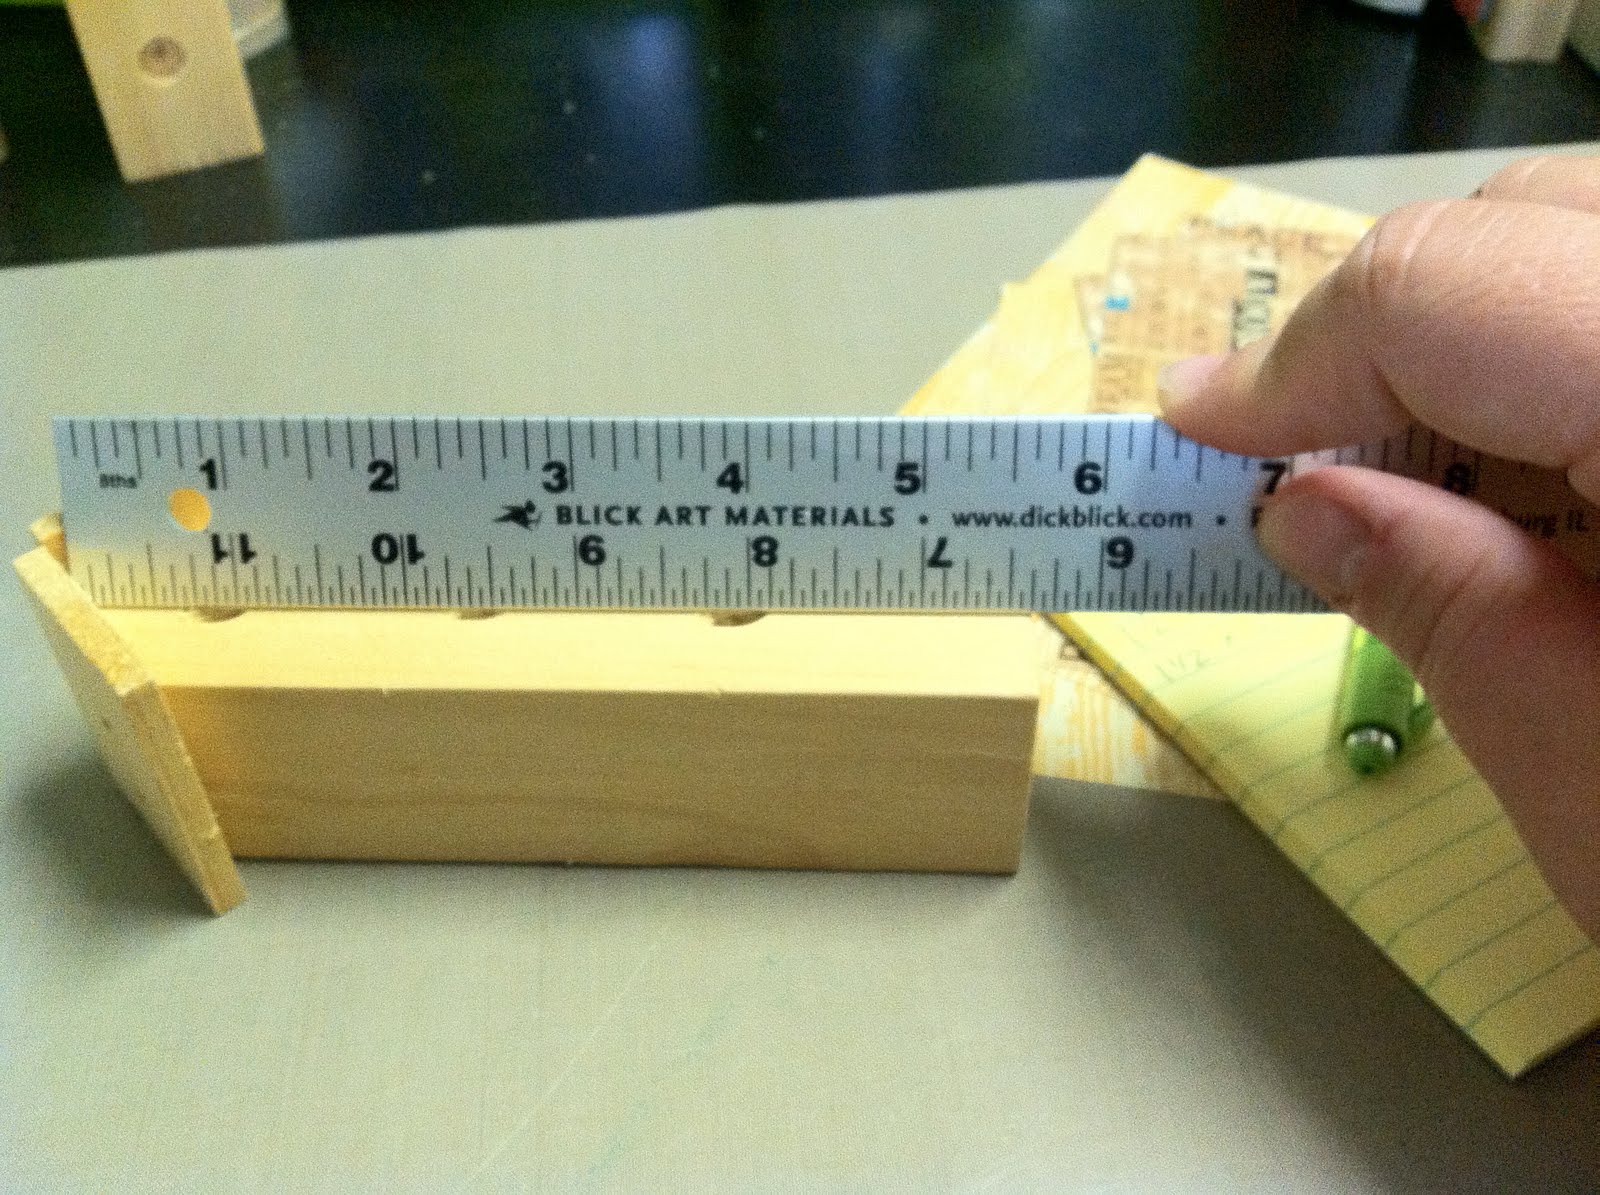
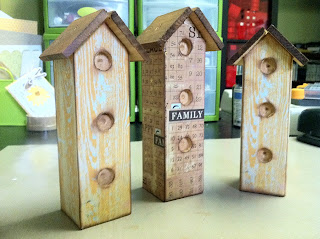
First, I measured each of the birdhouses to determine what size to cut my paper. I cut four pieces at two different lengths for the sides and front/back of the houses.
To get the angle right for the front and back pieces, I lined up a paper strip on the back of the birdhouse and with my thumbnail made a crease where the roof meets the house and trimmed the angles with my paper trimmer. I did this with both longer pieces for the front and the back.
To get the holes in the right place on the front of the birdhouse I put my paper in place and using a stylus I rubbed the outline of the circles. I then snipped them open with a scissor.
To give the corners and holes on the front of the houses a more finished look, I inked the paper pieces and the birdhouse itself with ColorBox fluid chalk ink in my favorite brown, Chestnut Roan.


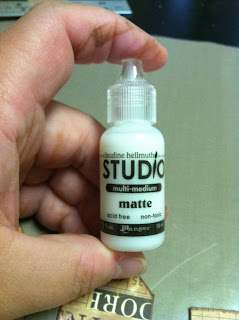
Once my pieces were inked, I was ready to put it all together. My favorite adhesive for projects like this is matte multi-medium from Claudine Hellmuth Studio (Ranger). It doesn't saturate the paper but creates a nice, firm bond.
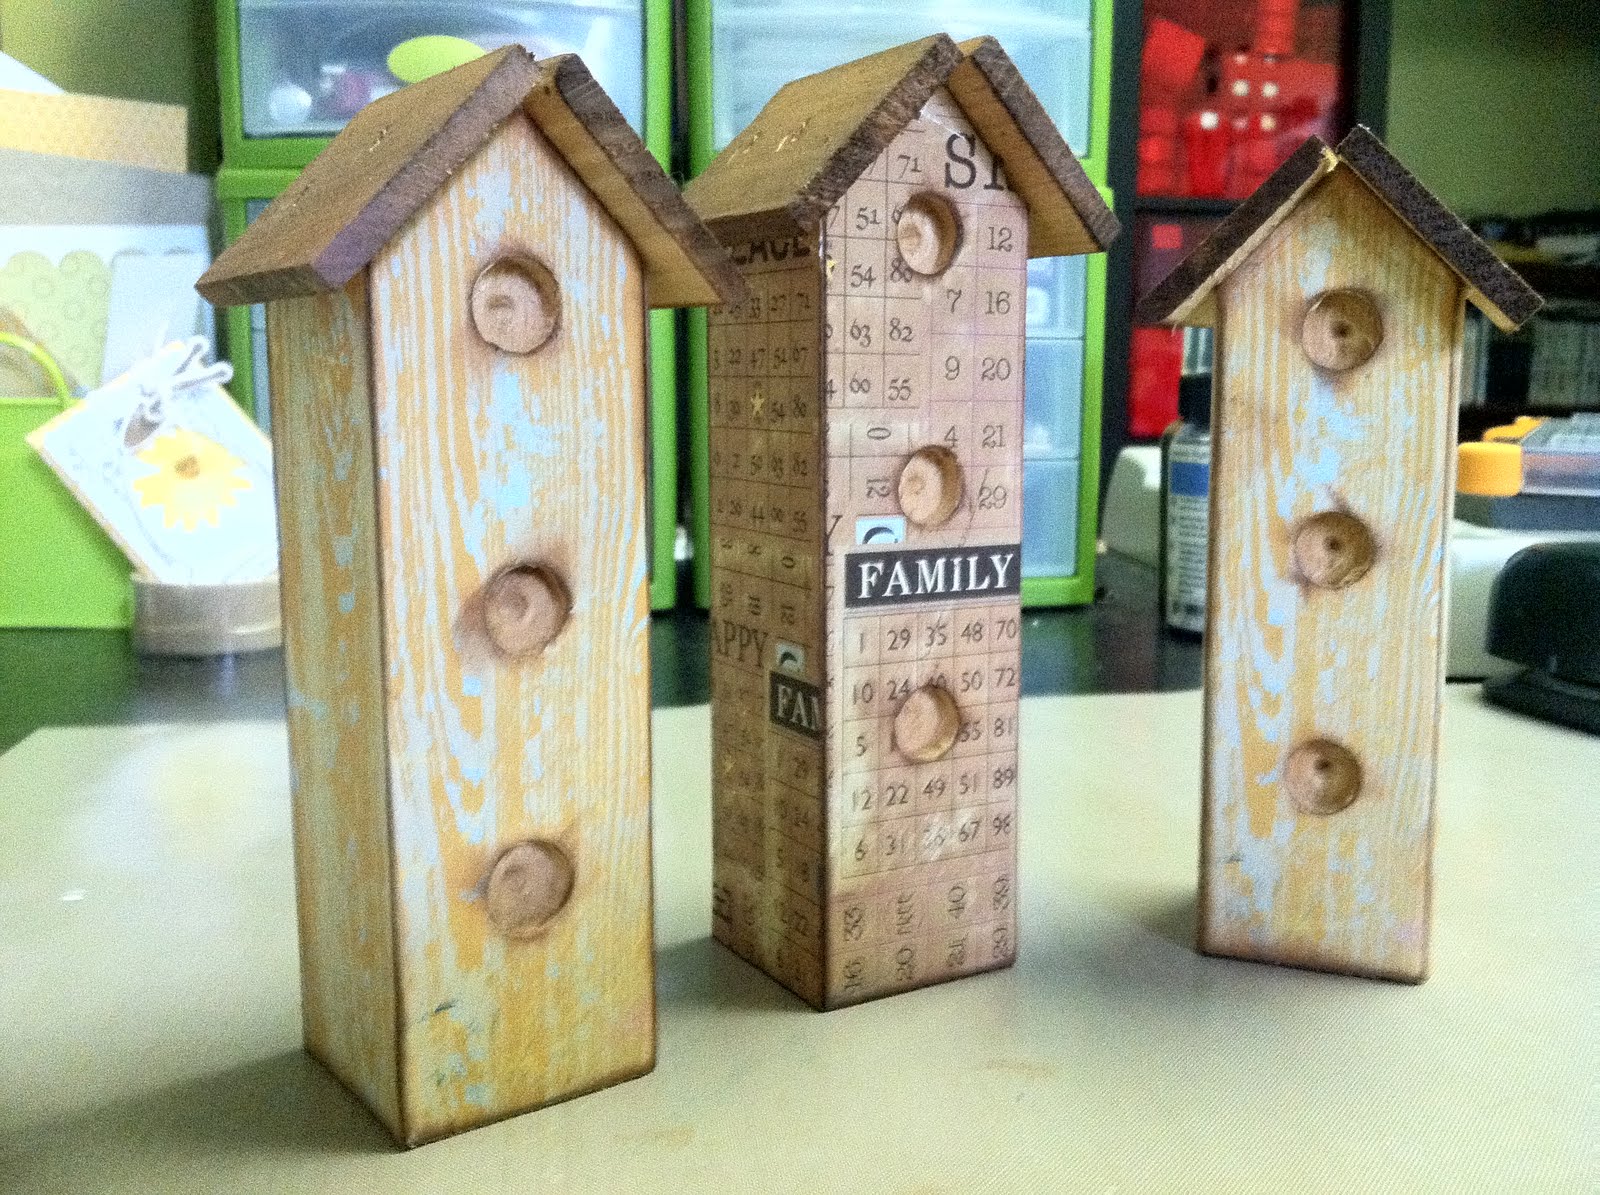
I repeated these steps for all three houses, and here's the result. They're pretty cool on their own, but where's the fun in creating something if you can't also embellish it?
I took another sheet from the 6x6 paper pad in a complementary color scheme and cut several rolled roses using dies from My Favorite Things (MFT). Using an additional paper from the 6x6 pad, I also cut leaves for the flowers using MFT dies.
After assembling the flowers, I added Kaisercraft pearls to the centers. I then arranged the flowers on the birdhouses and added leaves using 3M dimensional foam adhesive.
I added some word sticker sentiments, button twine from Papertrey Ink (PTI), and a hand stamped robin (image from PTI Iconic Images stamp set stamped on the yellow woodgrain paper from Authentique) to complete my project.
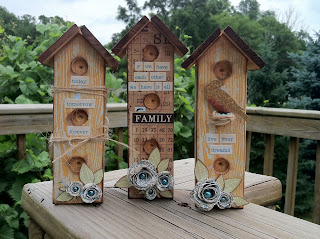
The robin's nest was made using PTI button twine I just wound and tied together. I adhered it in the hole using a glue dot and added three more pearls for eggs.
Here's a close up view of the flowers. After rolling each flower, I adhered the rose with a glue dot and then scrunched and folded the petals with my fingers to open them up and make them look a bit more realistic.
And there you have it. 3 wooden birdhouses, one line of paper, 4 hours of work, and a sprinkling of embellishments and I have a sweet display for my mantle.

Thanks for stopping by, and I hope you enjoyed my project from start to finish!

Supplies:
Patterned paper, word stickers: Authentique Paper
Stamped Image: Papertrey Ink
Twine: Papertrey Ink
Dies: My Favorite Things
Ink: ColorBox
Adhesive: Ranger (multi-medium), 3M (foam adhesive), Glue Dots
Pearls: Kaisercraft
Wood Birdhouses: Jo-Ann Fabrics and Crafts

Friday, July 29, 2011

Authentique and Pink Persimmon: Paper Pieced Card


Here's a little ditty I put together recently while crafting with some friends. My LSS was one of the first to get in the new Authentique paper lines and I picked up a couple of 6x6 paper pads. The beautiful floral print was perfect for paper piecing the dress on this image from Pink Persimmon. I picked up a couple of their stamp sets recently, and I really love this one!

I stamped the image on Papertrey Ink Stampers Select white cardstock and colored with Copic markers. I then stamped just the dress part of the image using selective inking on the Authentique patterned paper. I trimmed this with my Tonic scissors and an X-acto knife and layered it on the colored image, which I had trimmed out as well. I layered another Authentique patterned paper onto my card base and freehand cut the sentiment banner. Put it all together, and you have a super fun card!

Thanks for stopping by, I hope you enjoyed your visit!


Supplies:

Cardstock: Papertrey Ink (Stampers Select White, Spring Rain

Patterned Paper: Authentique (Splendid 6x6 paper pad)

Stamps: Pink Persimmon (Hello, Vintage Girl) and Lawn Fawn (Just My Type)

Ink: Tsukineko (Memento Tuxedo Black)

Markers: Copic

Wednesday, July 27, 2011

Make It Monday: Coloring with White Ink

This week's Make It Monday technique is coloring with white ink. Heather Nichols from the PTI design team put together a great project for us this week which you can find HERE.

I've been enjoying the new Sweet As Can Be set from their July release, so I broke it out again today. I stamped a double dip ice cream cone on kraft cardstock and used Fresh Snow ink on a bullet point fantastix to color in the ice cream. I fussy cut the cone out and added it to my card. The card base is Harvest Gold cardstock matted with nice, summery patterned paper from
Echo Park's Summer Days 6x6 paper pad. I tied a triple bow ribbon with Hug Snug seam binding and scrunched it with wet fingers until I liked how it looked and added a double stack of buttons with button twine tied in a bow. The cone is adhered with foam tape to give extra dimension. What I really love is that the sentiments in this set allow you to highlight the word "sweet" in a different color if you like, so that's what I did. I tried to take a cue from Nichole Heady in planning my colors. Those of you who were in Summer Card Camp may remember she tries to follow the rule of 3's with color, and I tried to do the same. :) Thanks for the tip, Nichole!

Supplies:
PTI: Sweet As Can Be stamp set; Harvest Gold and Kraft cardstock; True Black, Dark Chocolate, Fresh Snow, and Raspberry Fizz ink; Raspberry Fizz buttons; button twine
Echo Park: Patterned paper
Hug Snug: Seam binding tape

Thanks for stopping by! If you want to head back to Nichole's blog and see more fab entries for this week, click on the link above!

P.S. Fellow Stamp-A-Faire alumni will recognize the suitcase in my photo - I won a fabulous prize at the reception! Thanks, PTI!

Monday, July 25, 2011

Papertrey Ink July 2011 Blog Hop


It's that time of the month again, time to hop around the internet and see all of the fabulous things people are making with PTI products! This month's inspiration picture can be seen below:
I love the pop of life that the orange curtains in the photo create against the otherwise very serene color scheme, so I chose that element to focus on. I also like the pattern in the quilt and rather than use the Mehndi Medallion which was the first thing to come to mind, I pulled out Delightful Doilies to create my background. I stamped the images using True Black ink on Kraft cardstock randomly. I added the happy birthday sentiment from Inside & Out: Birthday stamped onto Stampers Select White cardstock cut with the Fillable Frames #11 die. I tied on a piece of Orange Zest twill ribbon and added the Prima e. line jewels. Finally, this was matted on a Stampers Select White card base. Super simple, yet classy with that great pop of color.

All supplies from Papertrey Ink unless otherwise noted.

Thanks for stopping by, and enjoy the rest of the hop! You can find the other amazing cards by going to Nichole's blog HERE.

Thursday, July 21, 2011

Summer Card Camp '11: Week 4 and PTI Make It Monday: Dry Brushing

It's already the final week of summer card camp. Where did the time go? On Monday, I got a package from Papertrey Ink with my July order (super amazing fast shipping, WTG PTI!) and so it was only logical that I break out my new stamps to work on this week's color combo. And since a new Make It Monday challenge was up at PTI, why not add that to the mix?

I chose the Hanging Out set and some fun paper from Echo Park. I made a mask for the clouds using a piece of cloud patterned paper. It's hard to see in the picture, but I dry brushed white acrylic paint through the mask. After the clouds dried I added the pen outline to give them more definition. I freehand cut the heart from Stampers Select White cardstock and stamped with Polka Dot Basics II and Jenni Bowlin Stick Candy green ink. The dress and overalls were cut from Echo Park patterned paper and stamped. Sentiment is from Fillable Frames #11. Grass is stamped with Jenni Bowlin Seed Packet green ink. You can kind of tell from the picture, but I only adhered the top of the die cuts to the clotes line and bent them slightly forward to make them feel like they are blowing in the breeze. Can I just say that I adore this stamp set? So fun to play with! Black ink is Tsukineko Memento Tuxedo Black.


All supplies by Papertrey Ink unless otherwise noted.


Thanks for stopping by!