I've had these wooden birdhouse pieces in my stash for a while that I picked up at my local Jo-Ann's store, and this week I was struck with an idea for how to use them.
 This 6x6 paper pad from Authentique has some great patterns in it, and I knew that it had just what I needed for my project. I also pulled out some "Diction" stickers and embellishments and went to work.
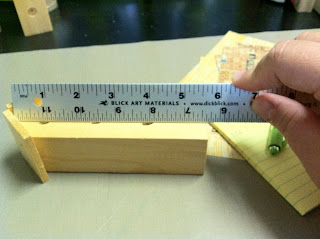
 First, I measured each of the birdhouses to determine what size to cut my paper. I cut four pieces at two different lengths for the sides and front/back of the houses.
 To get the angle right for the front and back pieces, I lined up a paper strip on the back of the birdhouse and with my thumbnail made a crease where the roof meets the house and trimmed the angles with my paper trimmer. I did this with both longer pieces for the front and the back.
 To get the holes in the right place on the front of the birdhouse I put my paper in place and using a stylus I rubbed the outline of the circles. I then snipped them open with a scissor.
 To give the corners and holes on the front of the houses a more finished look, I inked the paper pieces and the birdhouse itself with ColorBox fluid chalk ink in my favorite brown, Chestnut Roan.

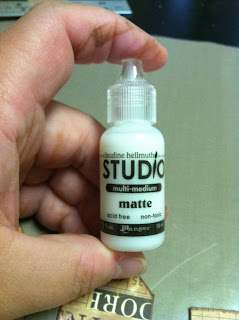
 Once my pieces were inked, I was ready to put it all together. My favorite adhesive for projects like this is matte multi-medium from Claudine Hellmuth Studio (Ranger). It doesn't saturate the paper but creates a nice, firm bond.
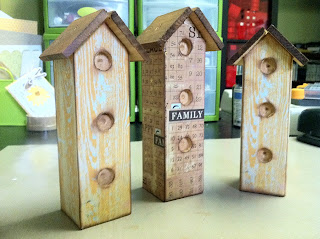
 I repeated these steps for all three houses, and here's the result. They're pretty cool on their own, but where's the fun in creating something if you can't also embellish it?
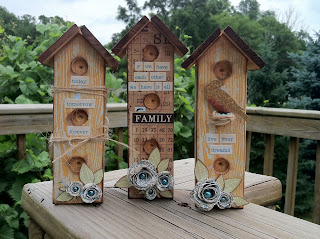
 I took another sheet from the 6x6 paper pad in a complementary color scheme and cut several rolled roses using dies from My Favorite Things (MFT). Using an additional paper from the 6x6 pad, I also cut leaves for the flowers using MFT dies.
 After assembling the flowers, I added Kaisercraft pearls to the centers. I then arranged the flowers on the birdhouses and added leaves using 3M dimensional foam adhesive.
 I added some word sticker sentiments, button twine from Papertrey Ink (PTI), and a hand stamped robin (image from PTI Iconic Images stamp set stamped on the yellow woodgrain paper from Authentique) to complete my project.
  The robin's nest was made using PTI button twine I just wound and tied together. I adhered it in the hole using a glue dot and added three more pearls for eggs.
 Here's a close up view of the flowers. After rolling each flower, I adhered the rose with a glue dot and then scrunched and folded the petals with my fingers to open them up and make them look a bit more realistic.
 And there you have it. 3 wooden birdhouses, one line of paper, 4 hours of work, and a sprinkling of embellishments and I have a sweet display for my mantle.
 Thanks for stopping by, and I hope you enjoyed my project from start to finish!
Supplies:
Patterned paper, word stickers: Authentique Paper
Stamped Image: Papertrey Ink
Twine: Papertrey Ink
Dies: My Favorite Things
Ink: ColorBox
Adhesive: Ranger (multi-medium), 3M (foam adhesive), Glue Dots
Pearls: Kaisercraft
Wood Birdhouses: Jo-Ann Fabrics and Crafts
Patterned paper, word stickers: Authentique Paper
Stamped Image: Papertrey Ink
Twine: Papertrey Ink
Dies: My Favorite Things
Ink: ColorBox
Adhesive: Ranger (multi-medium), 3M (foam adhesive), Glue Dots
Pearls: Kaisercraft
Wood Birdhouses: Jo-Ann Fabrics and Crafts


Beautiful, Jen! You are so incredibly talented.....I adore these sweet, little birdhouses!
ReplyDeleteWow! These are all so cool!
ReplyDelete